Not real happy with Yuasa

I had to install a new battery. The Yuasa wouldn’t supply enough voltage to keep the starter pinion engaged. The battery was 5 years old, but it’s had the best of care, been kept charged, and has seen very little use,. It”s also been kept in a warm garage. This battery is big. I remember the trouble I had putting it in. Getting it out was even worse. I finally had to pull the airbox to get the battery out that way. It wasn’t coming out from the top — even with the subframe bolts removed.

After a bit of research I decided to go with WestCo 12V30 sealed AGM. This battery is slightly smaller that the Yuasa, so it easily slid in from the top, and I didn’t have to loosen and tilt the battery tray. What a difference this battery made. It really cranks the engine, better than the Yuasa ever did.

New Fuel Lines

Mileage: 76,597

Maintenance Summary:

  • Installed New Fuel Lines

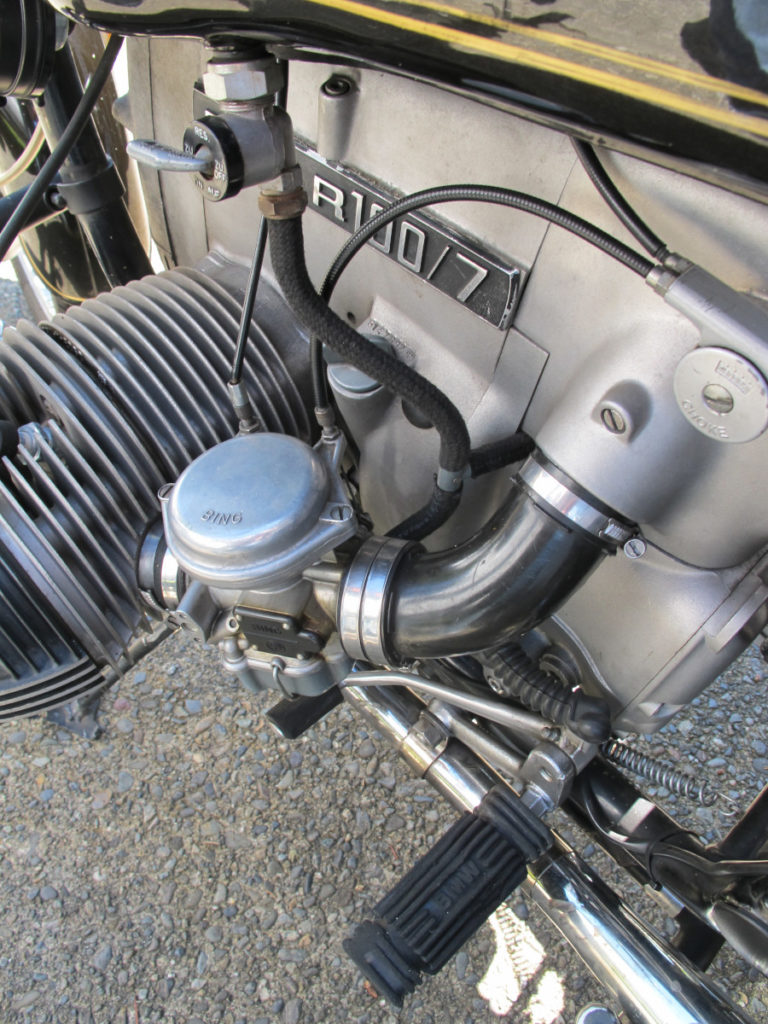
The previous owner had installed some inexpensive clear plastic fuel lines and in-line filters. Well, one of the lines slipped off and I had fuel pouring over a hot cylinder. Fortunately the fuel didn’t ignite.

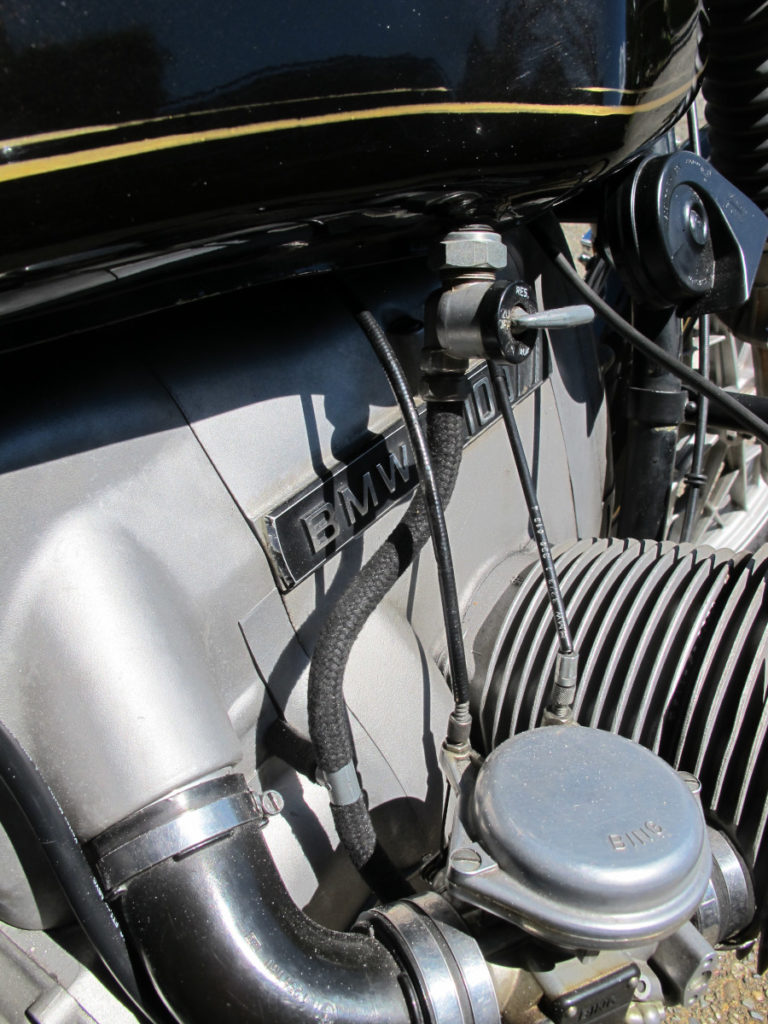
I replaced the plastic lines 7mm cloth covered Continental rubber fuel lines, just like the bike would have originally come with. I bought 3′ and had plenty to spare. I chose not to install filters. The bike didn’t come with them, and there are already filters in the petcock. The fuel line was easy to cut with a cable cutter that I use with battery cable gauge wire. It cuts square, and the cloth isn’t frayed, at least not yet. Some of the hose dealers will include heat-shrink tubing to hold the edge fraying to a minimum.

To get the tubing through the airbox I used a really long screwdriver that I own to help guide the hose end from one side to the other. It was a lot faster than pulling the airbox apart. A bit of electrical tape around the hose end and screwdriver helped pull it through the last bit. Otherwise I just pushed it though from one side.

Major Upgrades

Mileage: 76,213

Maintenance Summary:

  • Removed fairing
  • Rebuilt forks
  • Installed new progressive springs
  • Upgraded alternator and diode board
  • Replaced front engine seal
  • Installed new ground cable
  • Installed headlight bucket and new headlight
  • Installed new horns
  • Installed National Cycle Windshield

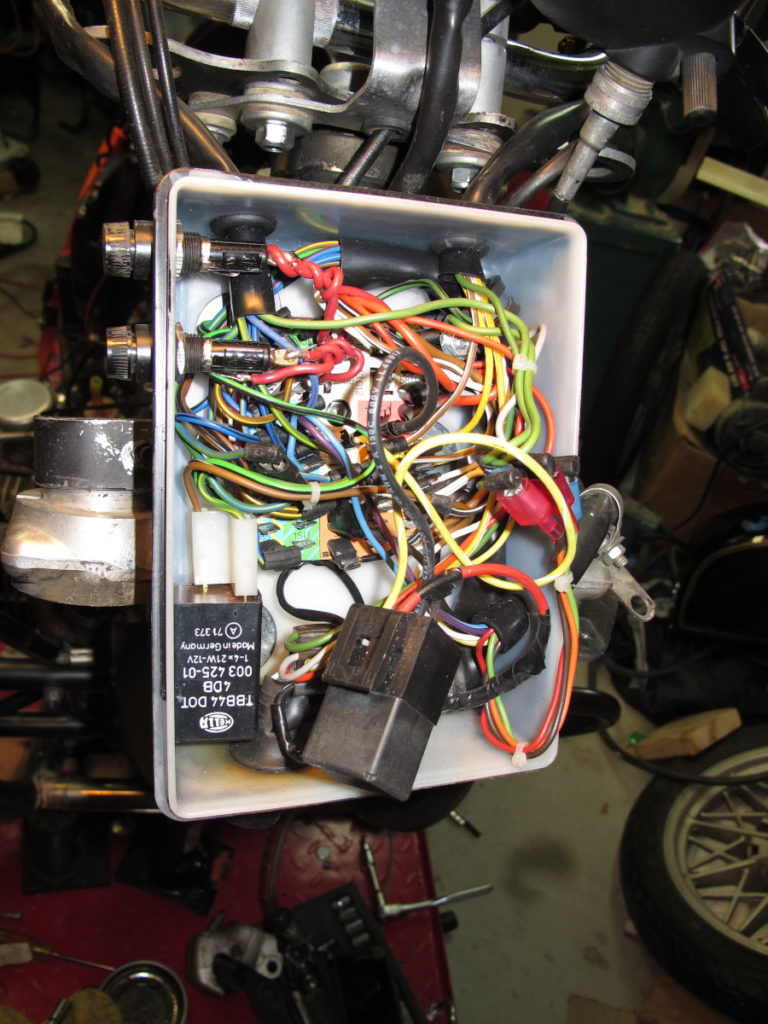
I’ve been collecting bits and pieces ever since I bought the bike with the intention of removing the fairing and returning the bike to the way it was when it was new. When the fairing was installed, the headlight bucket was removed, along with the bucket ears, turn signals and turn signal wiring. All of the remaining wiring that was originally in the headlight bucket was moved to a Tupperware box hidden behind the fairing and mounted to the forks.

The electrical system was always weak on this bike so as part of the transformation I wanted to improve the charging and starting performance. To that end I upgraded the alternator and diode board and installed a new battery ground cable. The horns were in bad shape as well, one was cracked and weak, and the other didn’t work so those both were replaced with new horns that are very loud.

With the fairing the bike would dive when braking and would sometimes be a bit sticky, as in not fully returning after coming to a stop. So a complete fork rebuild was also part of this upgrade. I put new progressive springs in figuring that would be an upgrade, but it turns out the bike already had progressive springs. I swapped them out anyway.

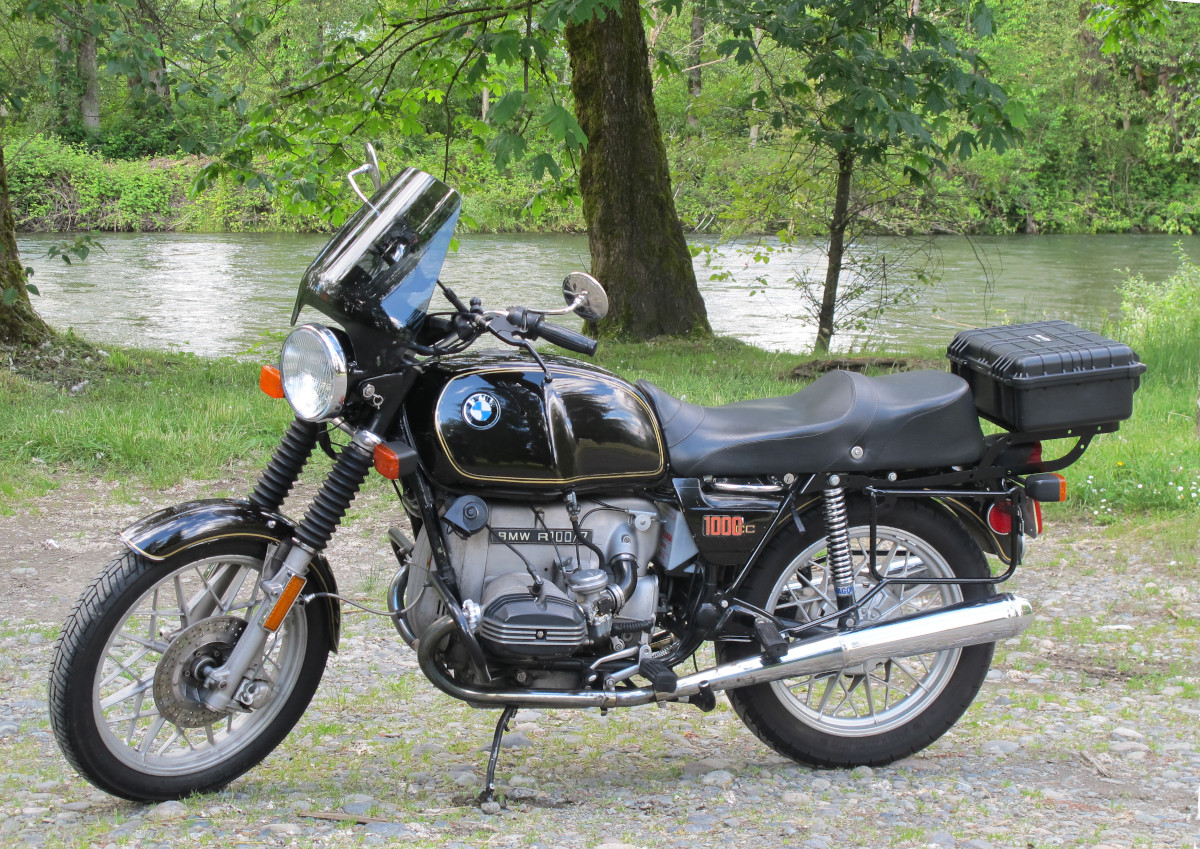
Here’s the transformed bike after its first short ride. What a difference! It’s like a new bike and loads more fun. The fairing added a lot of weight and just made the bike seem big. The short ride did show the need for some wind protection at freeway speeds, so I’ve installed a small National Cycle windshield (not shown here).

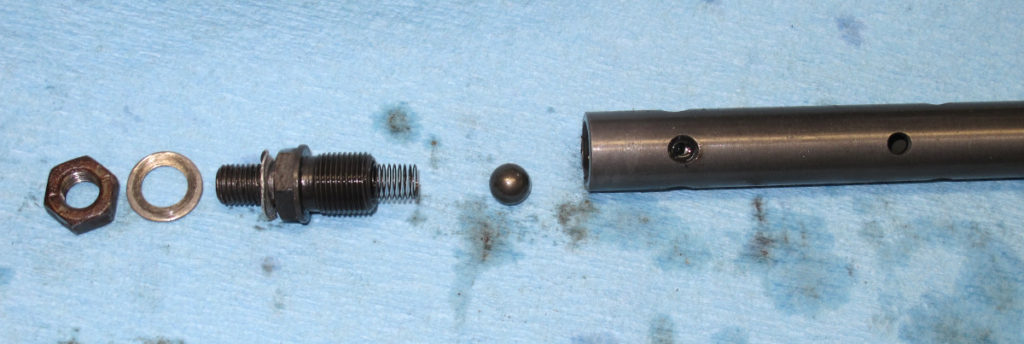
Fork Rebuild: The forks definitely needed rebuilding. There bumpers had dissolved, the oil was very dirty, and the crud had accumulated around the ball-valve spring to the point where I doubt it was working.

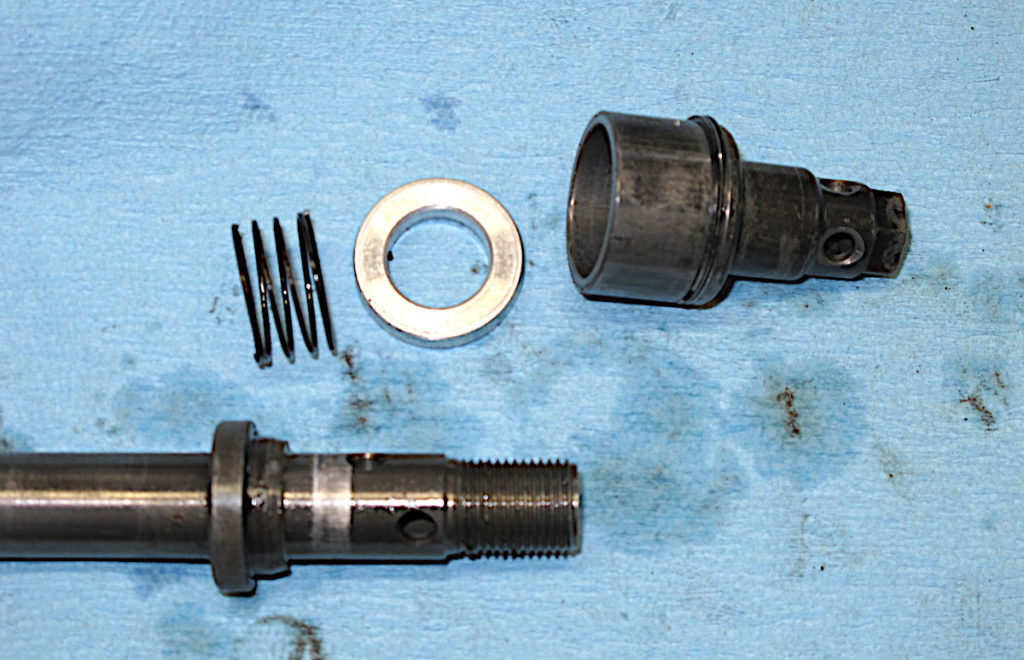
Damper Rod Check Valve (after cleaning)
Damper Rod Piston. The three rings on the piston were replaced as part of the rebuild

Alternator Upgrade: The alternator stator, rotor and diode board were replace with new Enduralast components. While I generally like to keep things original, and I did keep the old parts, these aren’t parts that are visible and the new diode board is a definite improvement. I tried to use the new voltage regulator that came with the upgrade kit, but it was flaky, so I reinstalled the original voltage regulator.

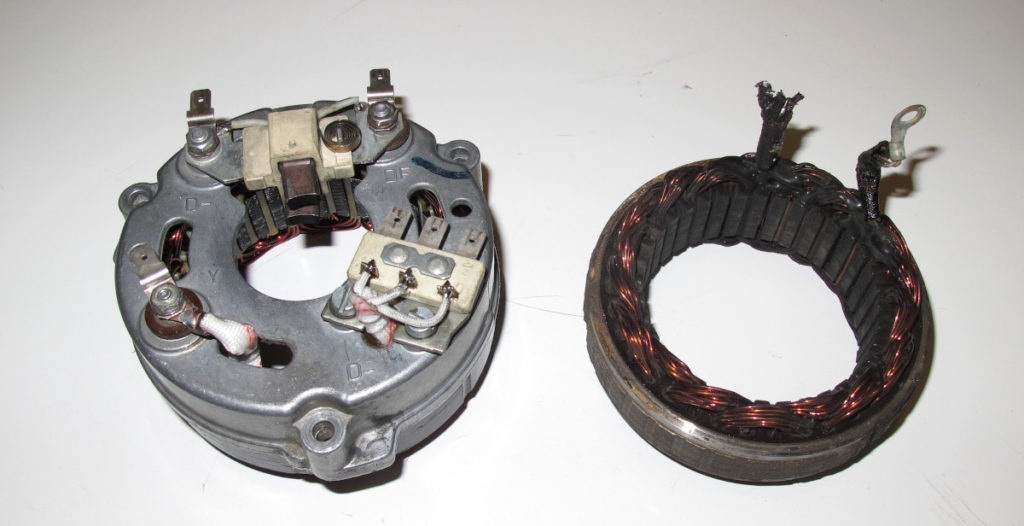
The upgrade kit includes a new stator which is installed in the original alternator housing. This is a fairly easy install, but does involve a little bit of soldering.

New Stator Installed. Original stator on the right.

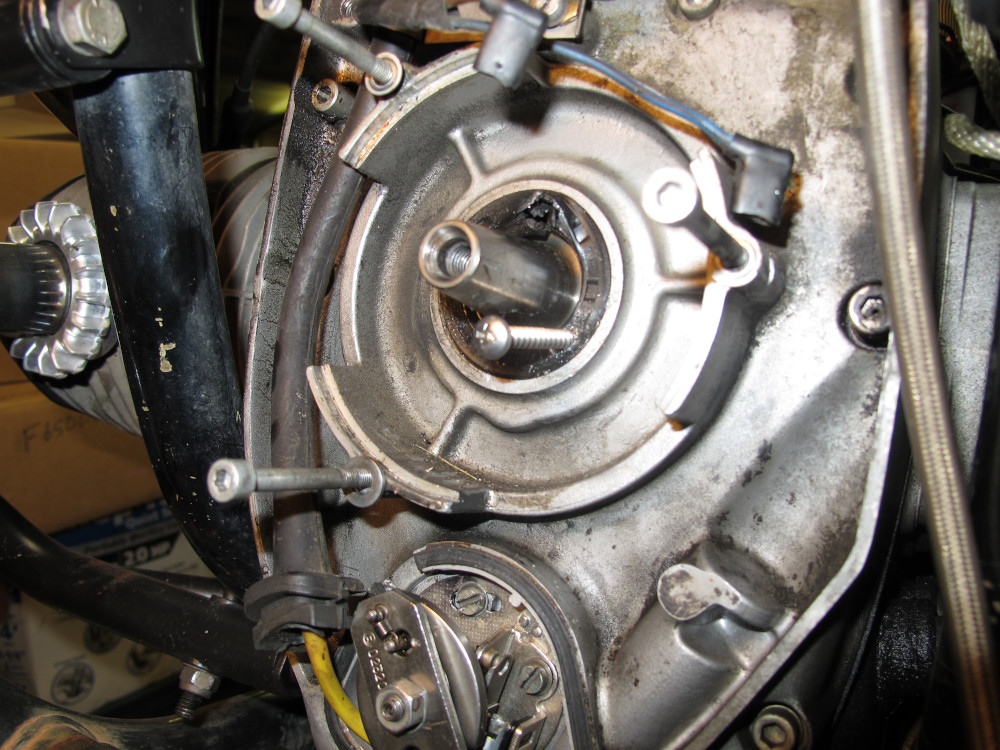
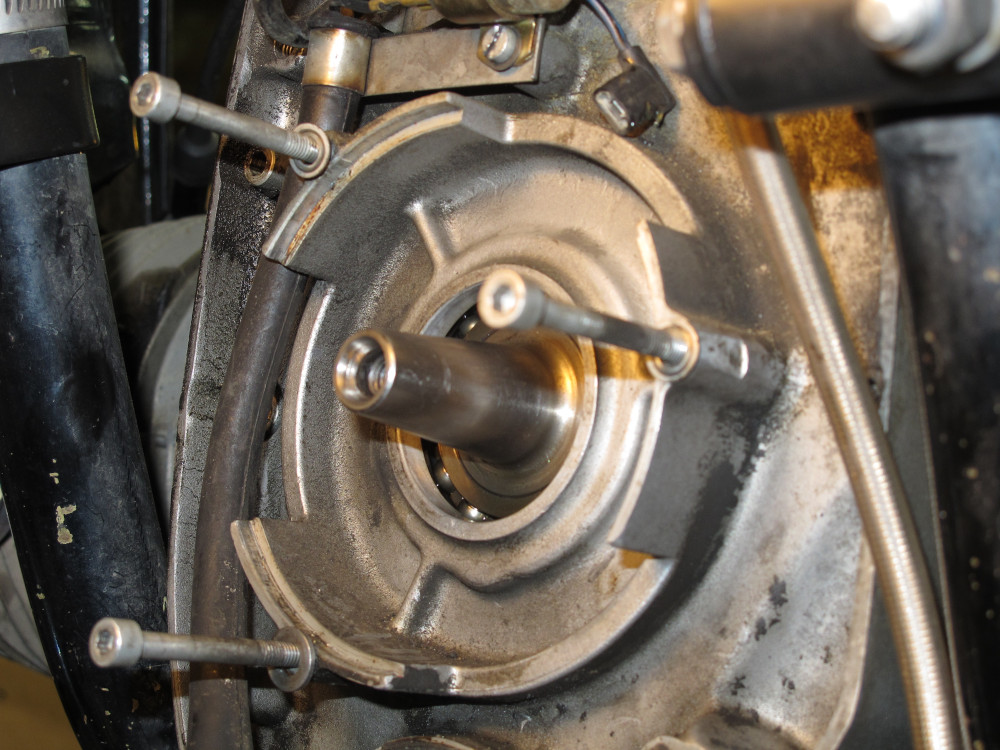
New Front Seal: While I had the rotor out, it seemed like a good time to replace the front engine seal.

Removing the front seal with a screw installed for leverage with a pry bar.
Crankshaft bearing visible with seal removed
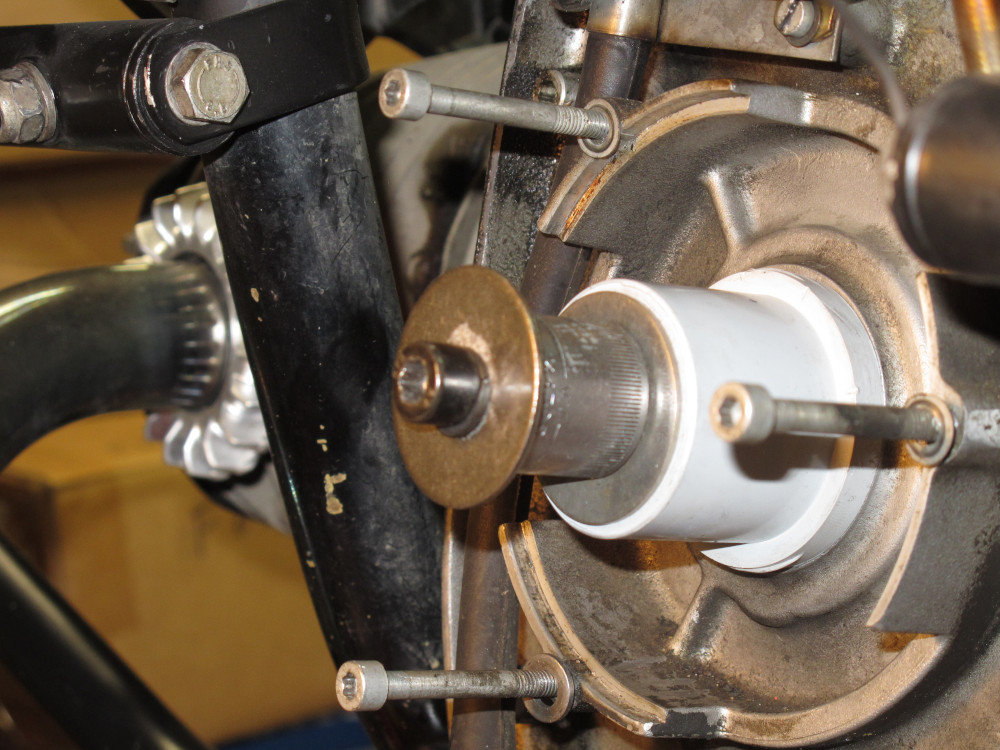
The new seal was pressed in using a PVC fitting, washers socket and rotor bolt.
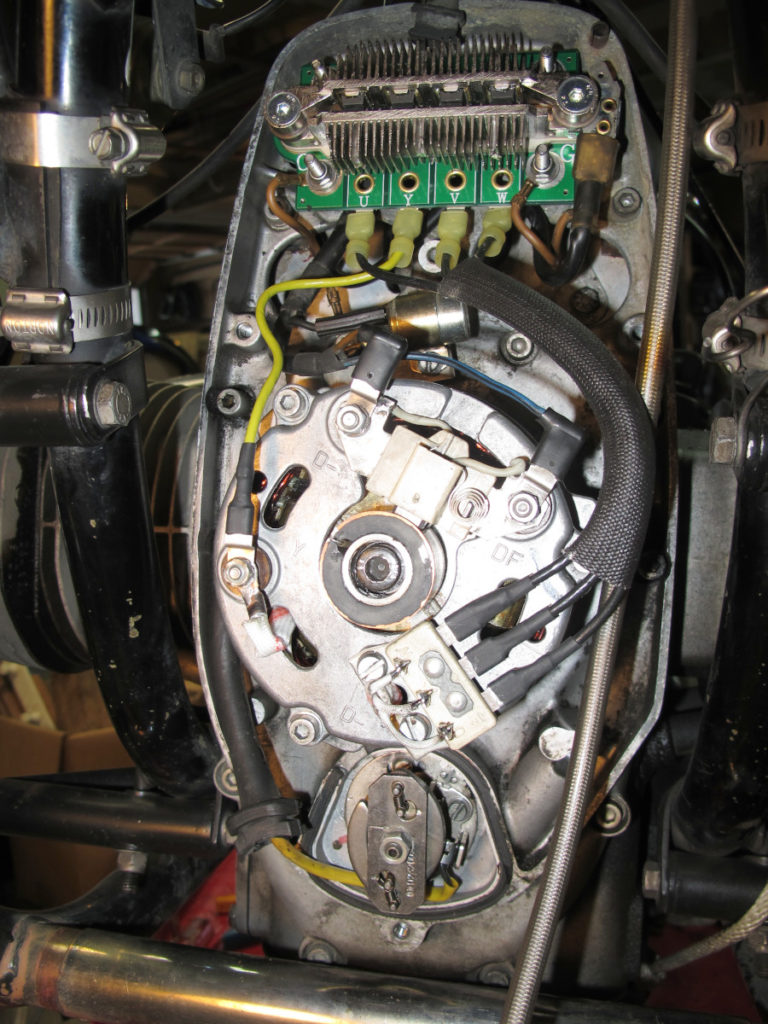
Upgraded alternator installed with new diode board

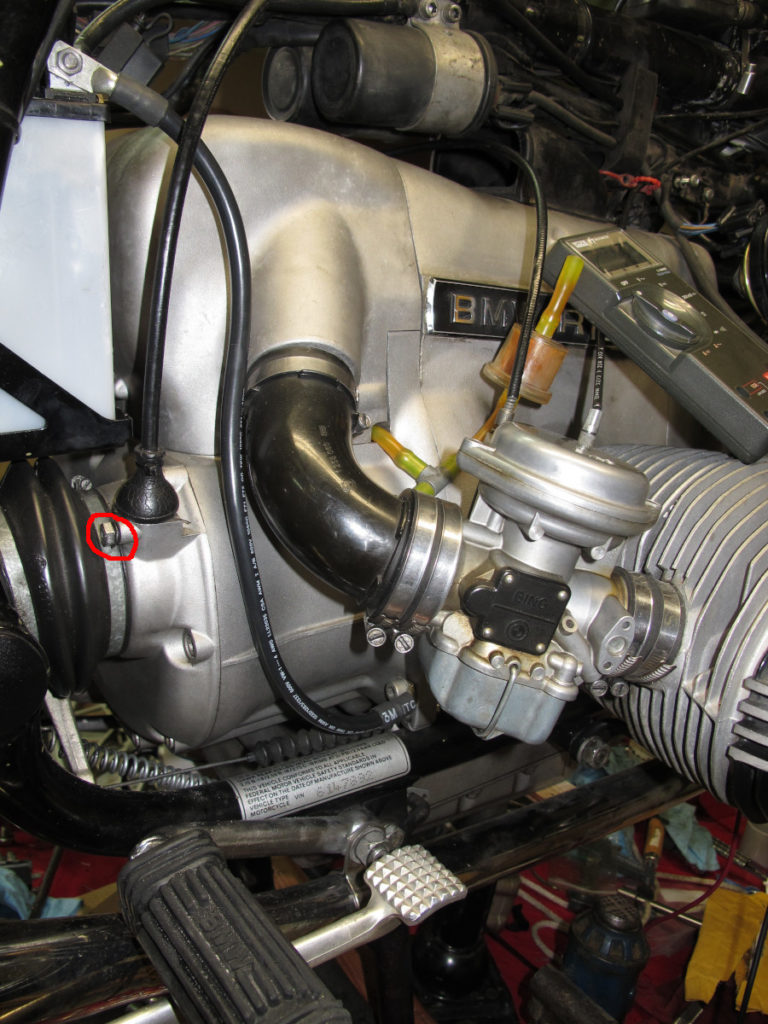
New Ground Cable: I suspect that the ground cable was a major contributor to poor electrical performance. The original cable, in a addition to being old, was attached to the bolt that retains the speedometer cable. This bolt is prone to stripping, and this bike is no exception, so the ground cable couldn’t be tightened to any great degree. I’m lucky to live near a marine hardware store so I can buy high-quality tinned connectors cable by the foot. I made a larger, longer cable to attach to one of the lower bolts on the engine case. While not original, you’d never know it as it looks correct.

New ground cable attaches below to the engine case below the carb instead of the speedometer cable bolt (red circle)

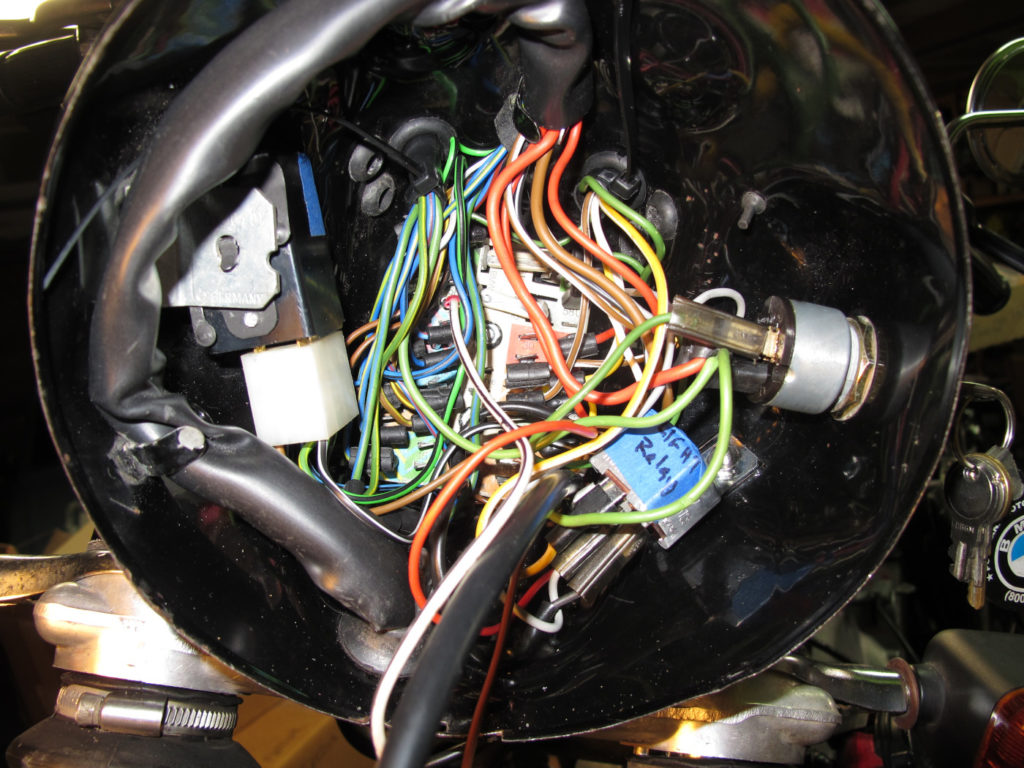
Installed headlight bucket, ears, turn signals and wiring: I found two used headlight buckets, one with a gloss black finish, and another with a mat finish. I’m not sure what the bike came with originally, but the gloss finished bucket was in better shape, so that’s the one I used. The first problem I had to deal with was the old wiring. Mounted to the forks, behind the fairing in a Tupperware box that was painted black is the wiring. Most of this wiring had to be disconnected and moved to the headlight bucket. Some of the wiring was specific to the fairing and needed to be discarded. The ignition switch had to be removed from the fairing and installed in the headlight bucket as well. I had to order wiring harnesses for both the left and right front turn signals.

There are a lot of wires, but the color coded circuit board actually made this process a lot easier than it looks.

Old wiring hidden behind the fairing.
All done.

New Battery

Mileage: 75,762

Maintenance Summary:

  • Activated and Installed Yuasa 53030 Battery

The Odyssey PC680 AGM battery that came with the bike when I bought it was the wrong size, and only about half the size and capacity of this new battery.  The PC680 is rated at 16Ah capacity and 170 CA.  The new Yuasa fits the battery tray and is rated at 30Ah and 300CAA.   The old battery is probably fine, but it wouldn’t start the bike when the garage was 50 degrees without first warming the cylinders with a hot air gun.

I bought the Yuasa as a dry battery, which means that I had to add sulphuric acid to activate the battery before it could be used.  I was able to buy the acid at my local auto parts store.   Activating the battery involved several steps:

  • Fill each cell to the full mark with acid.  A lot of bubbles are generated in this step.
  • Wait 30 minutes and add more acid to get back to the full mark
  • Slow charge (1.5A) for 20 hours
  • If necessary — it wasn’t — fill the battery again, this time with distilled water.
  • During all of the steps above, periodically give the battery a good shock to dislodge any large bubbles forming on the plates.


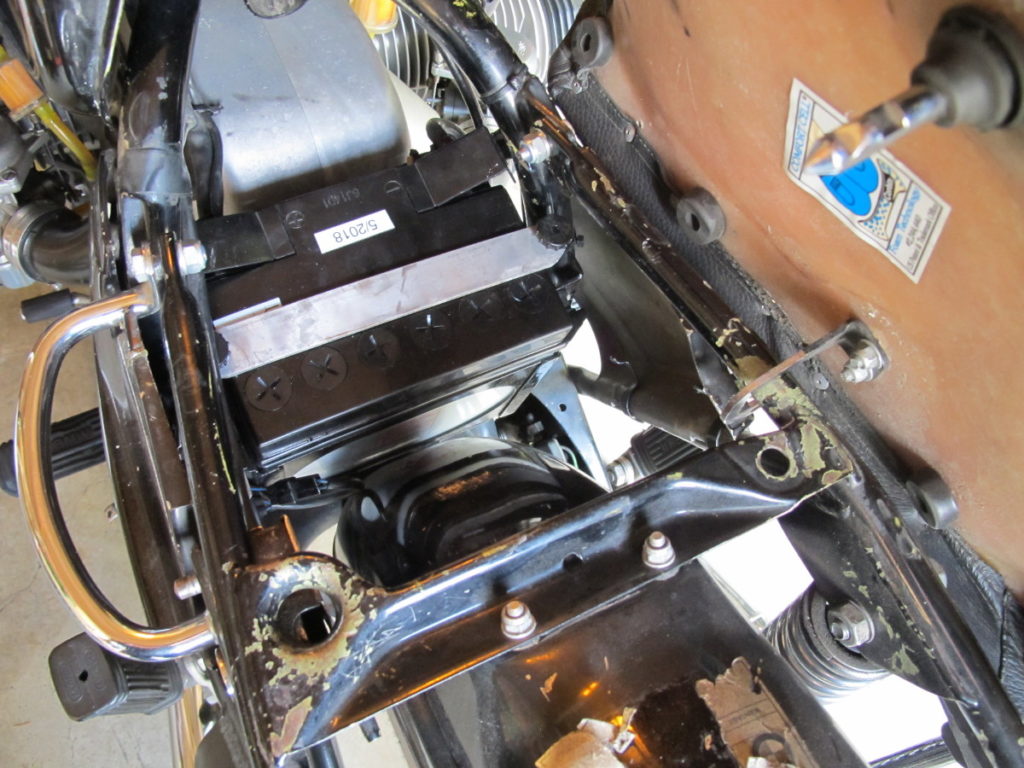
The only problem I had installing the battery was getting it into the battery tray.   First, the frame was too narrow above the battery to drop in in directly.  Part of the problem was interference from the subframe bolts.  You can see those bolts above the battery in the picture above. Even with the bolts removed, I couldn’t get the battery in.  I ended up removing the upper battery tray bolts to allow the tray to be tipped backwards on the lower rubber mounts, allowing the battery to be slid in at an angle.  Even then, it wasn’t easy.  I had to force the battery through the frame; it was hanging on the upper part of the battery where the battery is slightly wider than the case.


Transmission Normal

Ending Mileage: 75,527

I took the bike to Vellantine Motor Works today to have someone more familiar with airheads give their opinion on the condition of the transmission.  I know these transmissions are supposed to be a little clunky, but not having ridden one these bikes before, I wasn’t sure how clunky they should be.  After taking the bike for a ride, Dana said that the transmission felt normal, though he did suggest the bit of backfiring that I have on deceleration suggested the bike was running rich.

I filled the gas tank upon return, having flipped to reserve at 190 miles.  The bike returned 44 mpg on this tank.  Not bad!   The odometer also continues to work perfectly.

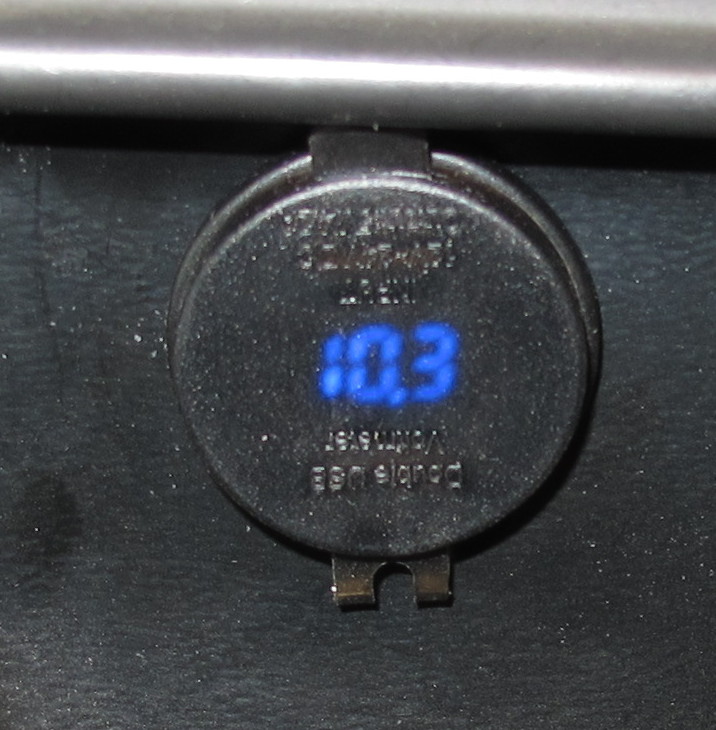
Installed Dual USB port with Voltmeter

Mileage: 75,455

Today’s task was to add USB ports to the bike for powering a phone, GPS, or charge something while underway.

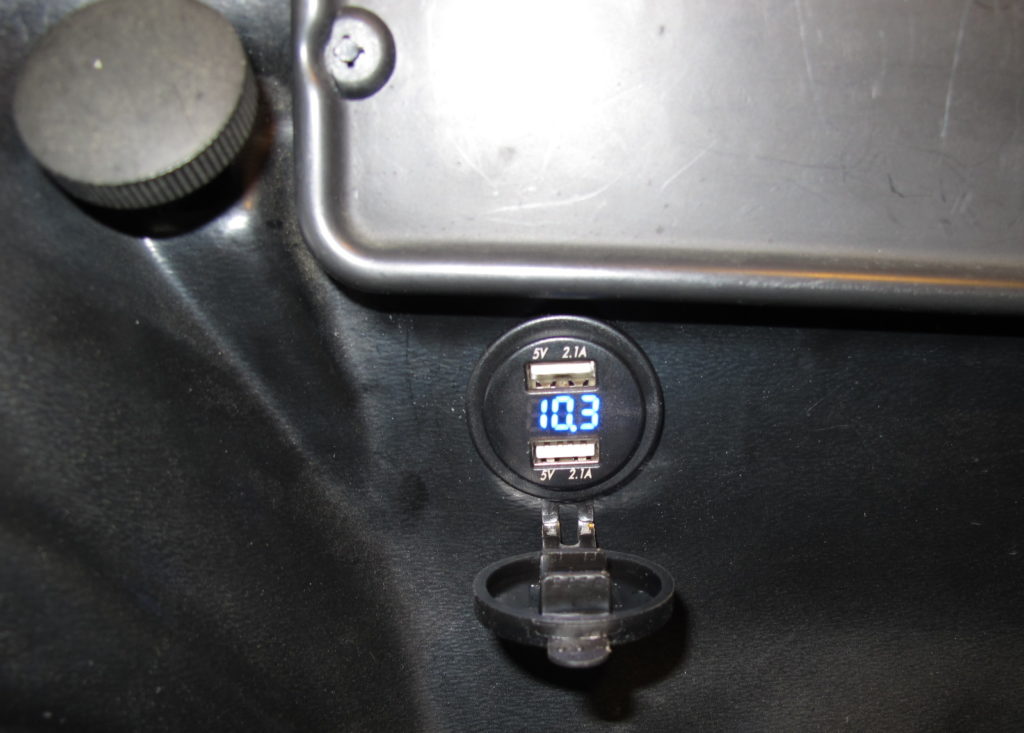
I found this little unit on eBay for $14.

The weather cover is semi-transparent, so you can still read the voltage with the cover closed, though I suspect it won’t be easy to see in bright sunlight.  The cover is currently oriented so that gravity will help keep it open.   The cover isn’t keyed, so it can be oriented any direction.  We’ll try this for a while.

I was hoping, given there was a place for a radio, that there would be unused wiring that I could use to power this device.  No such luck. I had to add a ground wire and pull power off of the switch.  For the later I built a short splitter cable with spade lugs on the cable ends.

While the fairing wiring was in pretty good shape, it was a bit unusual.  For example, there’s a plastic block with a diode hooked into the wiring harness.  After a bit of poking around, I’ve decided that the diode is there to combine the accessory and run positions of the switch to power the running lights.  I was hoping to be able to use the USB ports without turning on the headlight, but that would have meant connecting to the cathode side of the diode which is going to be at least 0.7v lower than the battery.  As currently installed the meter and USB ports will only work when the key is in the run position.

As you can see from the reading, the voltage looks a little low.  There are three reasons for this.  First, the engine isn’t running and all of the lights are on, so the battery is being pulled down a bit.  Second, when compared to my Fluke voltmeter, this meter seems to read about 0.1V low.  The largest error comes from the fact that the grounds inside the fairing are not at the same potential as the engine.  I’m not yet sure why that is.  Either there’s another diode somewhere, or there are some ground connections that need attention.  I suspect the later as the ground potential increases when the headlight is turned on. To troubleshoot this problem I’m going to have to pull the fairing so that I can get to the tupperware junction box.

Note 1:  To pull the radio cover you need to pull the slender center pins to allow the larger split pins to collapse.

Note 2:  I found a spare indicator bulb for the two red turn signal indicators in a bag tie-wrapped to the wiring harness.  The right turn signal indicator doesn’t work, so I pulled the bulb.  Unfortunately, the bulb is fine, so there’s another wiring problem that needs to be fixed at some point.


Corbin Seat Installed

Ending Mileage: 75,455

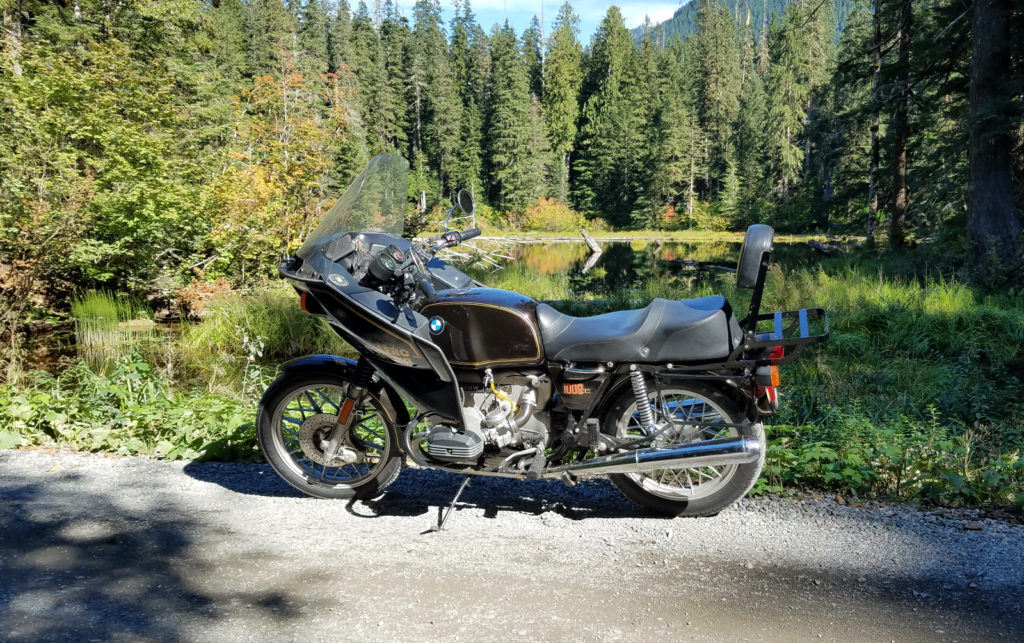
I found a nice leather Corbin seat for sale on Craigslist the other day.  I think it looks much better than the seat that came with the bike.  I’m still not sure about the fairing, though it is growing on me a bit.   As you can see in the picture the old back rest is still on the luggage rack. I’ll probably remove it.  I do have a matching backrest that came with the Corbin seat.

I took the bike for a 200 mile ride yesterday.  It was a nice, early-fall day.  The bike was running well, so well that I decided to take a chance and go on a gravel road that’s well outside of cell service.  That’s where the picture above was taken.

The Corbin seat, while firm, was still comfortable over the 200 mile trip.  If it weren’t for yard work that needed to be done, I would have tested it further.

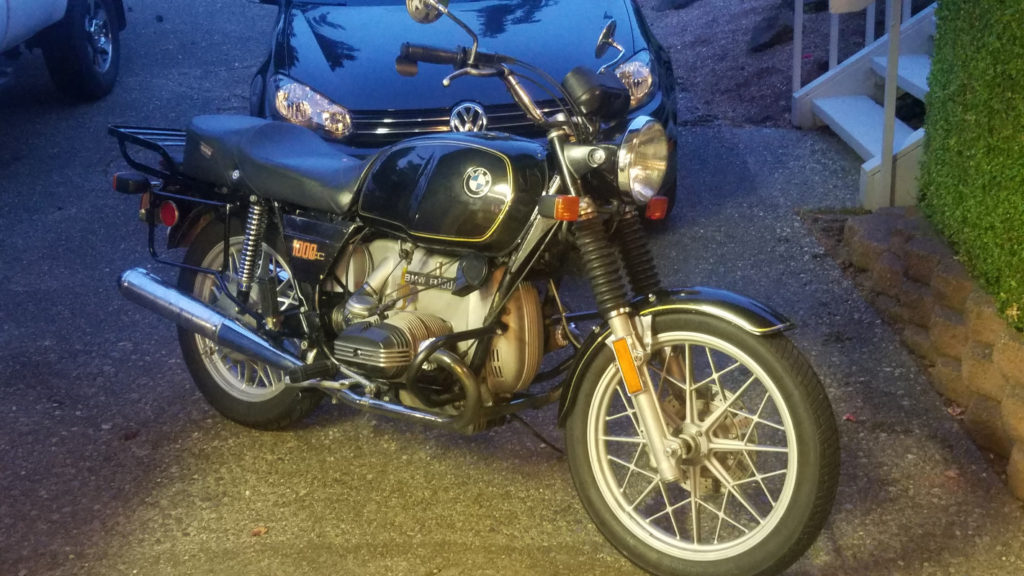
Here’s the bike with the  seat that was on it when I purchased it.  It’s comfy, but I think really detracts from the bikes appearance.

Bike’s original Craigslist Ad Picture

Instrument Repair

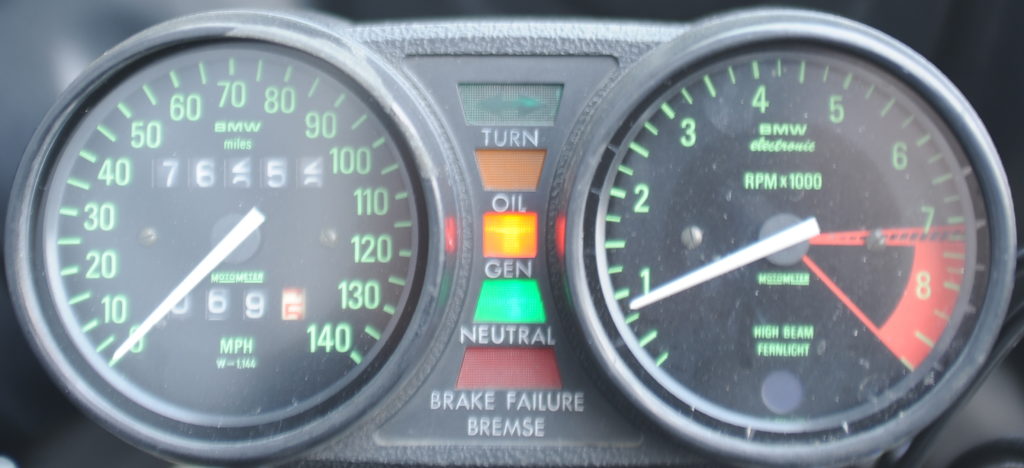
The instruments had several problems.  As noted earlier, the odometer ran fast, even though the trip meter worked correctly.  If you believed the odometer, I could get more than 1000 miles on a single tank of gas.   The second problem was that the turn signal indicator didn’t work.  The third problem was that the instruments no longer seemed to be sealed against moisture.  They’re also in need of a good cleaning.

Here’s the before picture showing more than 76k miles.
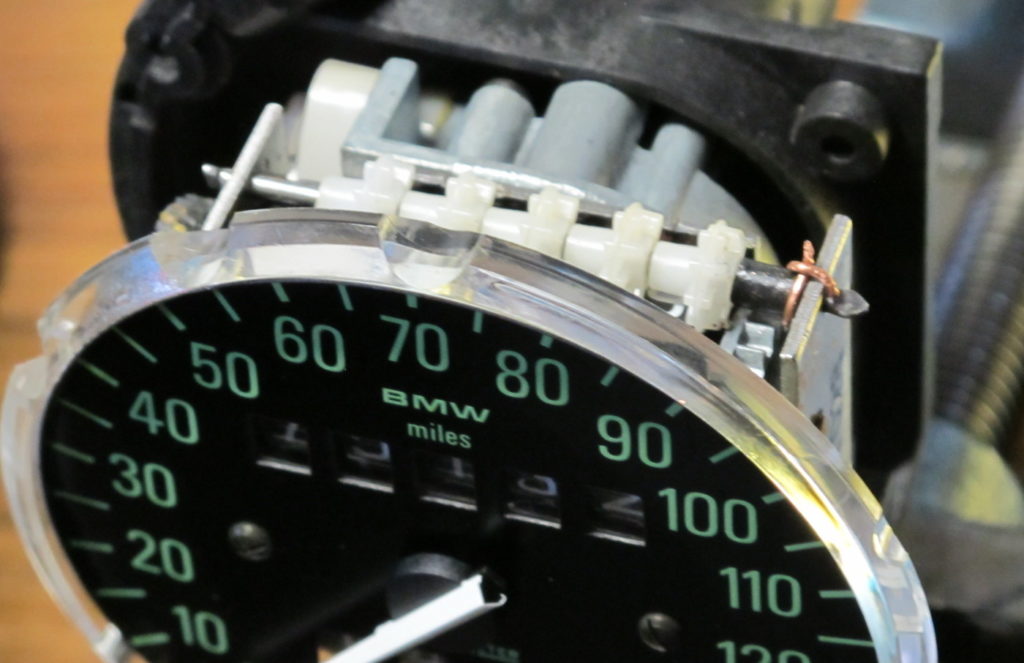
This next pictures shows my first attempt to fix the odometer.  When I opened the case I discovered that the first gear which spins the mile digit was slightly damaged (chewed up), obviously from being in the wrong location relative to the metal gear.  This first fix was wrong-headed and didn’t work.  Instead of holding the gear away from the metal gear below it, I needed to move the gear over the metal gear, so I removed the plastic spacer and copper wire that I had added and started over.
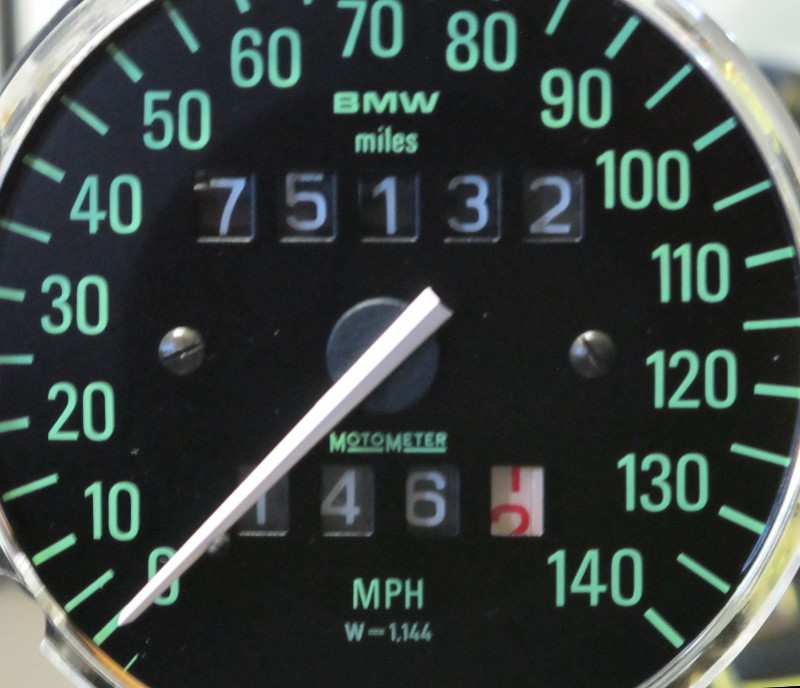
All of the white gears are identical, so I pulled the shaft that they’re on and moved the damage gear from the far right position to the far left position.  I then shifted everything, dials and gears, to the right as much as possible so that the far-right gear is over the metal gear.   After putting everything back together I left the shaft end in a slightly flattened shape.  It doesn’t slide out easily, but it can be slid out with a little bit of pressure.

When I had the gears out I attempted to repair the damaged gear.  Using heat, I reshaped the damaged teeth.   They’re better, but not perfect.  With the less than perfect gear on the far left, it’s not going to spin very often, and if something does go wrong it will be very obvious as the reading will change (or not change) by ten thousand miles.

The reason that the odometer was reading high is that, unless the white gear is over the metal gear, the mile digit is free to spin, and it will.  The dials are mounted on a shaft that spins when the bike is moving, and though not fixed to that shaft, there’s enough drag to spin the dial.  When the white gear is over the metal gear, the dial can’t move, except when it’s supposed to.  That occurs when the notch in the metal gear’s circumference grabs a tooth on the white gear.

I didn’t do anything to prevent the gears from sliding back to the left, so the problem may return.  If it does I think I’ll install a small spring on the left side of the shaft to keep things shifted to the right.  It’s not obvious to me how everything is supposed to be held in alignment.  Friction?

As I don’t know how long the odometer has been broken, I reset it to the mileage that was on the bike when I bought it, plus my best guess at how many miles I’ve put on the bike, which isn’t many. I’ve done a lot of work on the bike and I do want to keep track of how many miles have elapsed since performing that work.  There’s no way of knowing how many miles are on this bike, but it’s likely less than 75k.

At some point I expect the odometer to stop working completely — another common problem on these bikes.   While working on the odometer  I noticed the metal gear slipping a little bit its shaft.  This only happed when the white gears weren’t lined up correctly and things weren’t spinning easily.   It seems fine now, but if the gear gets any looser on the shaft  I’ll have to take things further apart as the speedometer dial will have to be removed to gain access to that part.

Update: 9/14/17 The metal gear did slip, right away.  However, I was able to repair the problem WITHOUT removing the speedometer dial as described here.  I began by loosening the screw on the left side so that the worm gear could be disengaged.  This allows the gears to be spun by hand, which makes it easier to apply epoxy all of the way around the metal gear and shaft.  I now believe that the gear was not only slipping, but that it had slid to the right a bit, which is why everything else was loose.  So, I pushed the metal gear on the right, back to the left, while pushing in on the gear on the left (the gear which engages the worm drive).  This tightened everything up.  Next I cleaned the right gear and shaft with alcohol and then, for extra grip, scratched the shaft next to the gear with a small precision screwdriver.  Using the same screwdriver I applied JB Weld Hightemp epoxy to the shaft/gear joint, being careful to keep the epoxy away from the plate that the shaft goes through.   The end result was almost identical to this picture.  I used this particular JB Weld epoxy because it’s a thick putty.  It was easy to shape while spinning the gear, and it didn’t run all over the place.  So far, so good!  The odometer and trip meter agree over the first 100 miles.
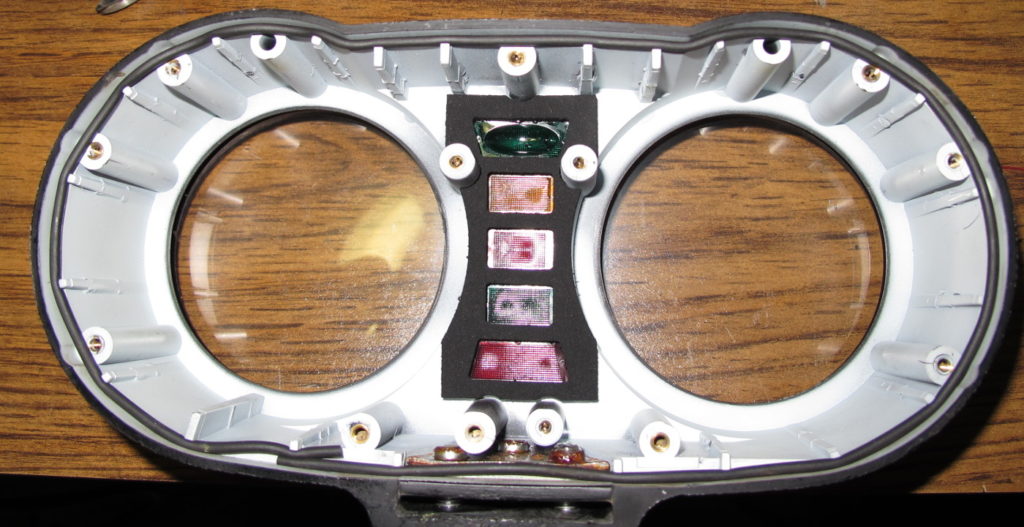
While I had the case apart I also cleaned the frosted glass and replaced both the outer o-ring seal, and the center indicator light seal.On to the indicator lights.
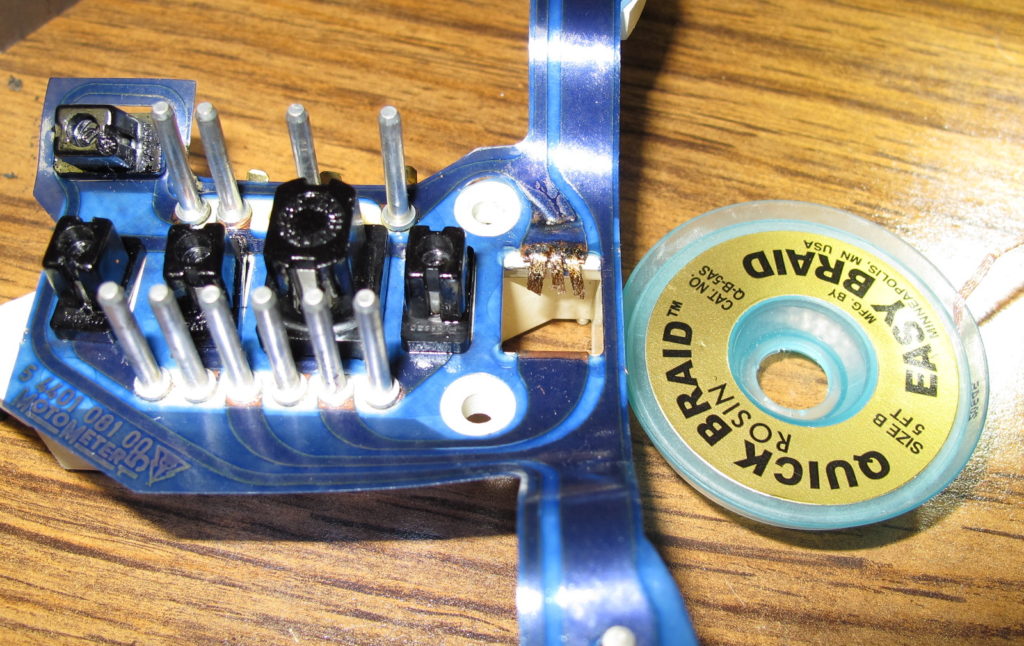
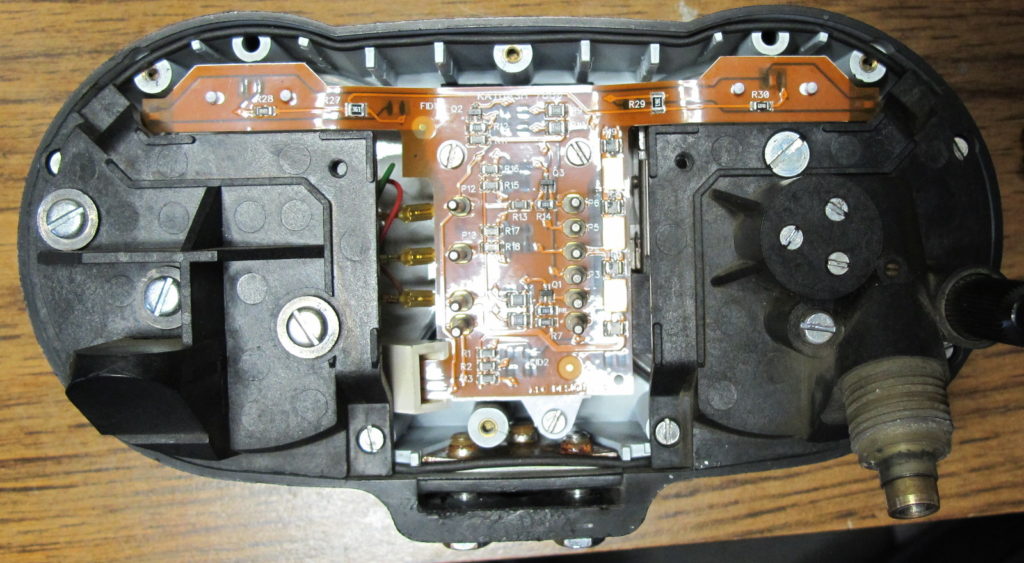
The turn signal indicator didn’t work because a copper foil tab had broken off and gone missing.  This is a common problem with this design.  I was able to repair this by exposing a bit more of the foil and soldering on three short strips of solder wick.  This isn’t the best solution, but I didn’t have any copper tape.While the repair worked,  I’d heard good things about an LED based replacement board from Katdash.com, so I ordered one. As shown below, it comes with new gaskets.
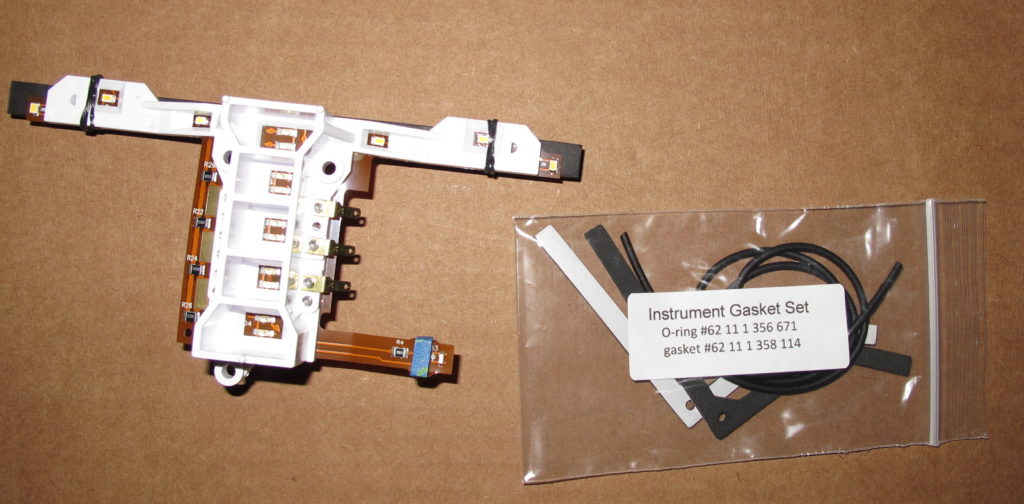
I’d already replaced the outer o-ring seal, but not the foam seals — those are no longer available from BMW.   As you can see, the foam seals that were on the bike had not been carefully installed.They old seals came off easily and the new Katdash foam seals fit perfectly.  I used the shaft of a small screwdriver to help align the hole in the tape with the hole in the plastic as I was installing the new seals.
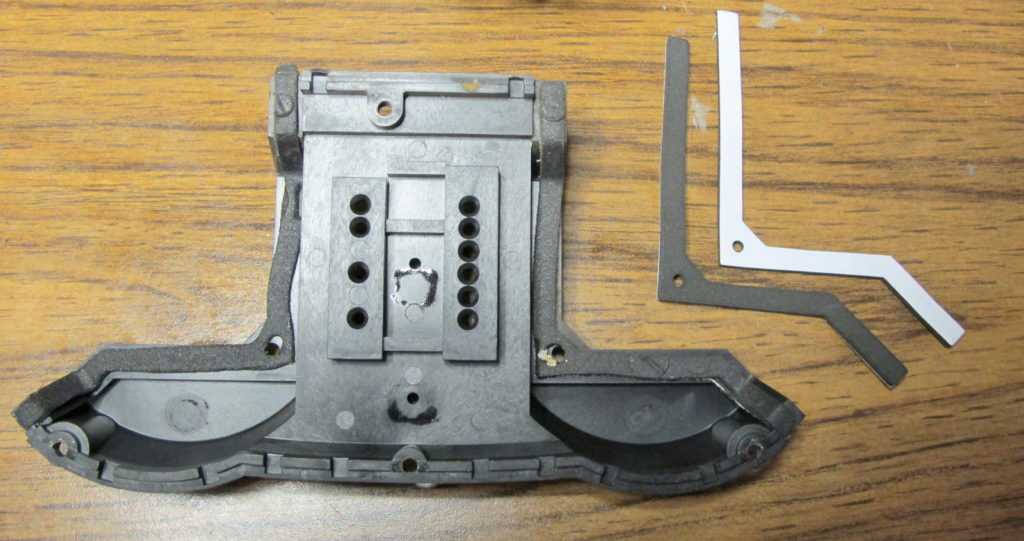
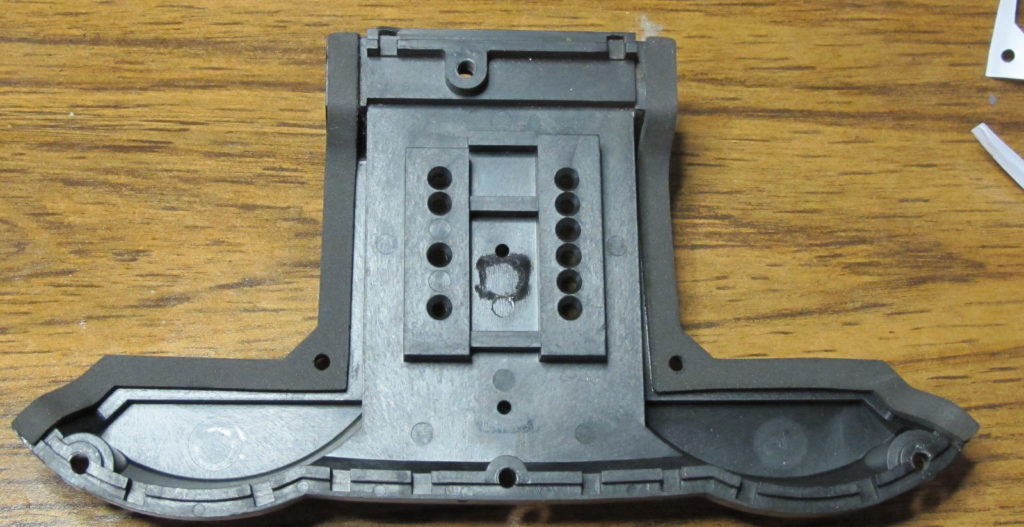
Having replaced every seal,  my hope is that the instruments will be less susceptible to moisture.   From the design of the instrument pod, I don’t expect it will be waterproof.

Here’s the new LED board after installation.  One difference on this board is that the high beam indicator extends much further into the light tube making the high beam indicator very bright — a significant improvement over the old design.The indicator lights are definitely brighter! 
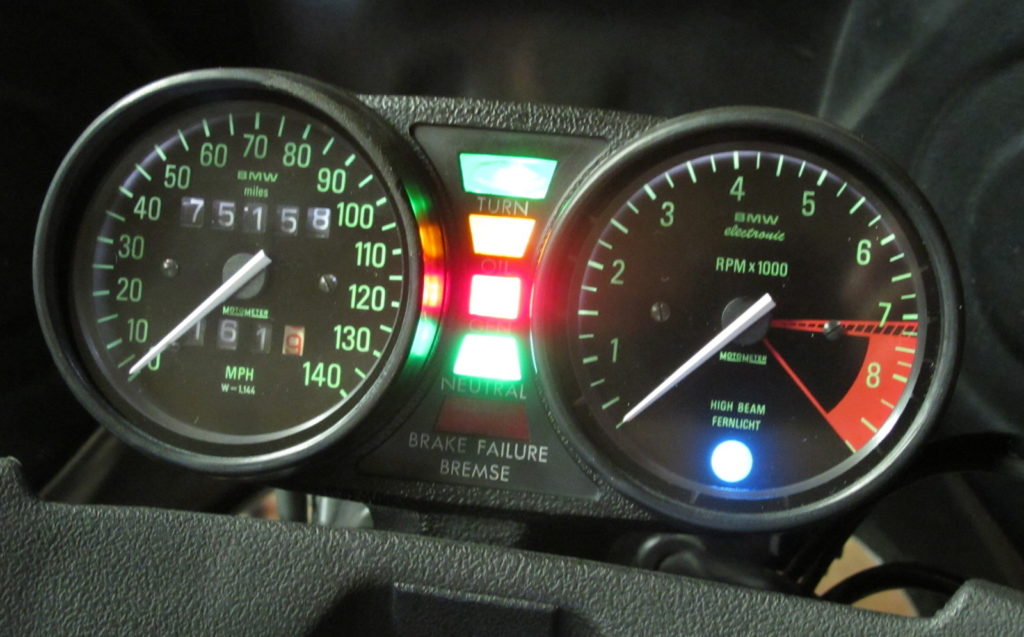
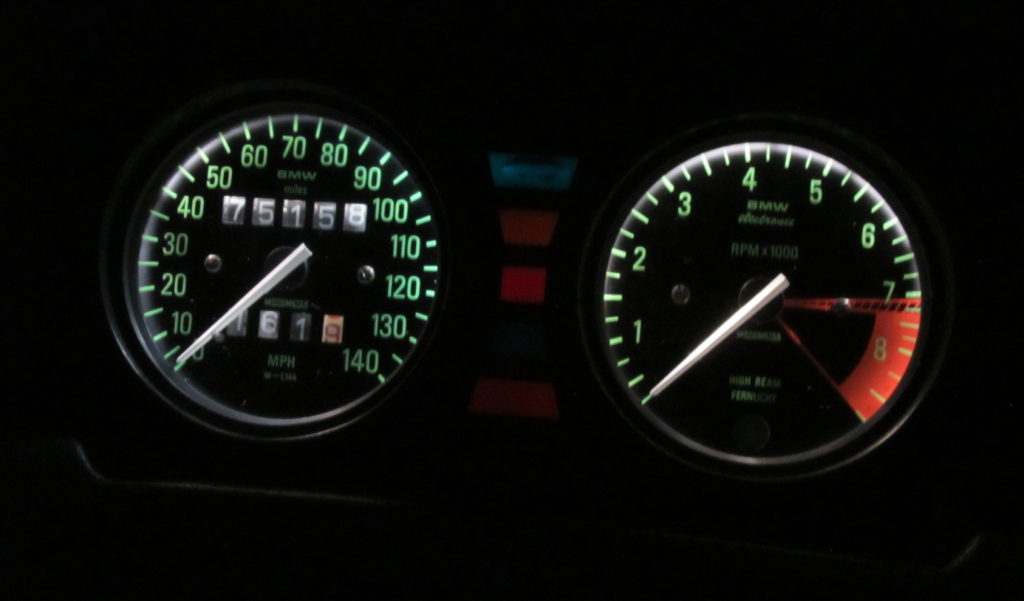
While brighter, the new instrument lights aren’t as warm.  The light is cooler, more white than yellow.  Still, looks good!
New front tire, repacked front wheel bearings, re-installed exhaust and center stand

Summary of recent work:

  • Repaired center stand mounts, re-installed Reynolds ride-off stand
    • Lube bushings with red lithium
    • Added lock washers
    • Used Blue Loctite on center stand bolts
  • Repacked front wheel bearings: NLGI 2 with moly
    • Replaced right seal (original missing spring)
    • Re-used left seal (only managed to order one)
  • Mounted and balanced new front tire: Metzler Lasertec 3.25h19
    • Balanced with 40g
    • New Tube
  • Tire Pressure:
    • Front: 34 psi
    • Rear: 37 psi
  • Front wheel and axle:
    • Axle nut torqued to 26 ft-lbs
    • Axle clamp torqued to 11 ft-lbs
  • Re-installed Exhaust
    • Installed New Exhaust Nuts
    • Used red-copper anti-seize on the exhaust nuts and on the mufflers.

After problems I documented in a previous post with what was supposed to be a factory center stand I re-installed the Reynolds Ride-Off center stand.  I used the bushings from the factory stand to replace the broken bushings.  The bushings were lubed with red lithium grease.  I installed the bolts with blue loctite (instead of red) and added BMW lock washers.   The decision to use blue was to allow the stand to be more easily removed later for painting or powder coating.  I purchased new bolts and springs for the center stand.  The new bolts are pre-coated with red loctite, so I held off using them.  The Reynolds stand stretches springs more than the factory stand, so I’ve saved the new springs for installation at another time.

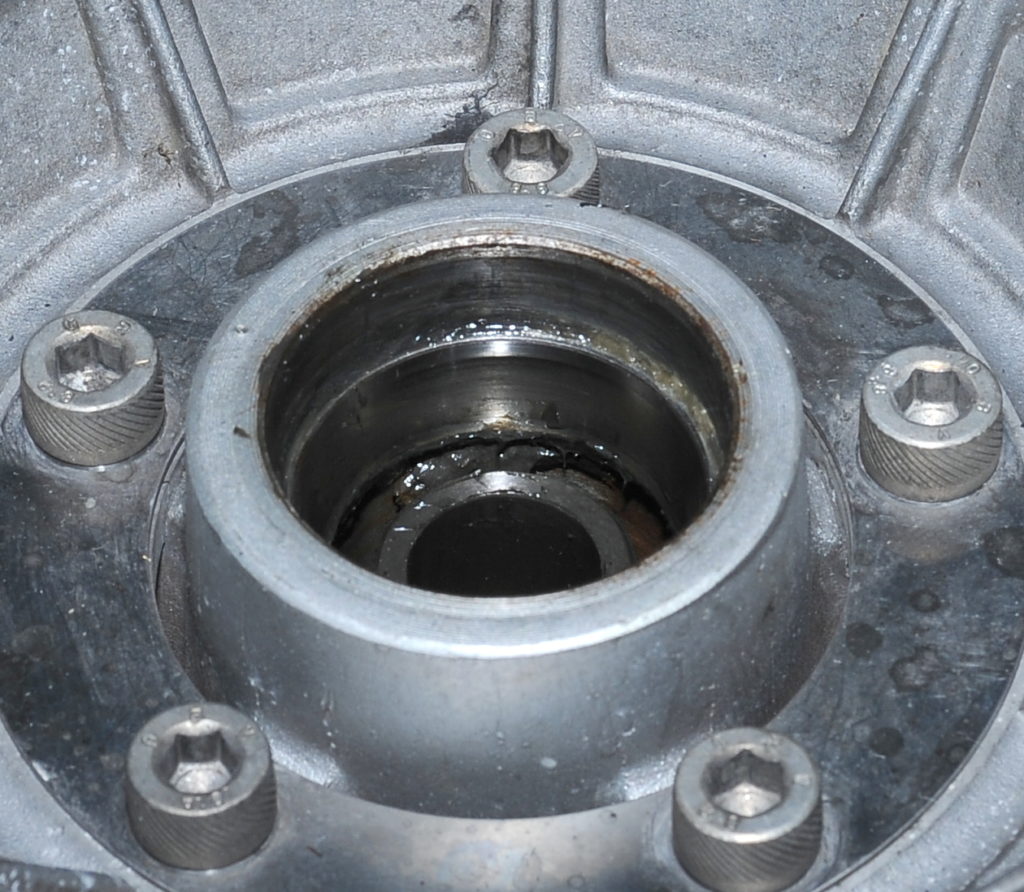
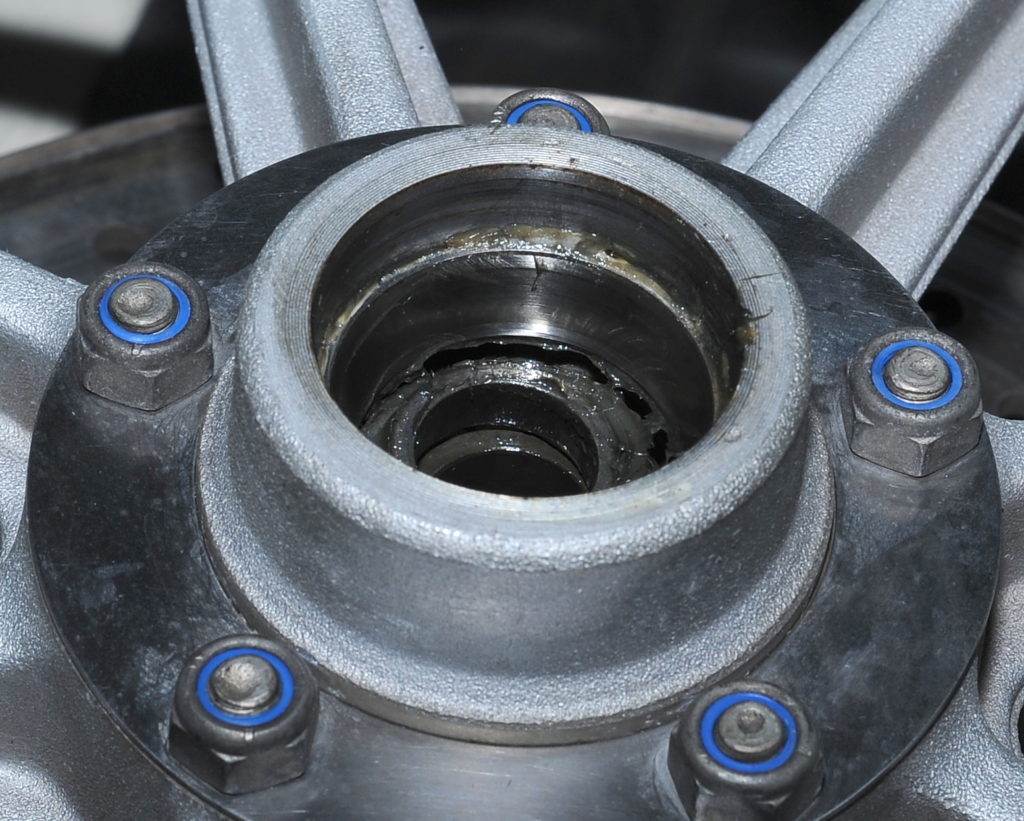
With the center stand installed I could work on the front wheel.  I installed a new tire and tube, and then balanced the wheel.  While the wheel was out I inspected and greased the bearings.  As you can see from the pictures below, the bearing races are in great shape.  I packed the bearings with fresh moly-enhanced NLGI 2 multi-purpose grease and installed a new seal on the right side.  I was going to replace both seals, but somehow only one got ordered (or was delivered).  The right seal was missing the spring.  I’m not sure about the left seal spring, but since I only had one new seal, it was a moot point.

Left front wheel bearing race

Right front wheel bearing race


As noted in a previous post I had to destroy the exhaust nuts to remove the headers.  I purchased new factory nuts from Max BMW, who’s service, by the way, I was not very impressed with.  I’m even less impressed with the new nuts.  They felt significantly lighter.  In fact they’re 12% lighter.  The old nut weight 94g, the new, 83g.   From the picture you can see why.  The fins are both thinner and shorter.  This reduces their heat-conduction effectiveness and makes them more susceptible to breaking, the later of which I suspect was BMW’s primary motivation, that and saving a few pennies in materials.  The new nuts were installed with red-copper anti-seize.  I’ll be loosening and re-coating those on a regular basis.  These exhaust nuts aren’t cheap.  Given another chance, I wouldn’t buy BMW exhaust nuts.  On the plus side, now that the bike is 22g lighter it should be significantly faster.