The final drive… has arrived! It’s time to start putting the bike back together.
Today’s Summary:
- Installed replacement oil pan and gasket, pan bolts torqued to 72 in-lbs
- Added engine oil, Castrol GTX 20-50 (SJ)
- Reinstalled swing arm, shocks, final drive
- Shocks bolts torqued to 25 ft-lbs.
- Final drive-to-swing arm bolts torqued to 22 ft-lbs
- Swing arm pins torqued to 180 in-lbs and then to 100 in-lbs
- Swing arm lock nuts torqued to 75 ft-lbs
- Greased swing arm bearings: NLGI 2
- Added final drive oil: Sta-Lube 80W-90
I had Hansen’s Motorcyle in Medford, Oregon rebuild the final drive. In addition to re-manufacturing the splines, they also replaced the main bearing and seals. I’m quite pleased with the results. I also really appreciate Hansen’s attention to detail. They included the paper swing arm gasket, and it looks like they may have included new crush seals for the filler bolts. They also returned the parts they removed.
Here’s a closeup of the new splines.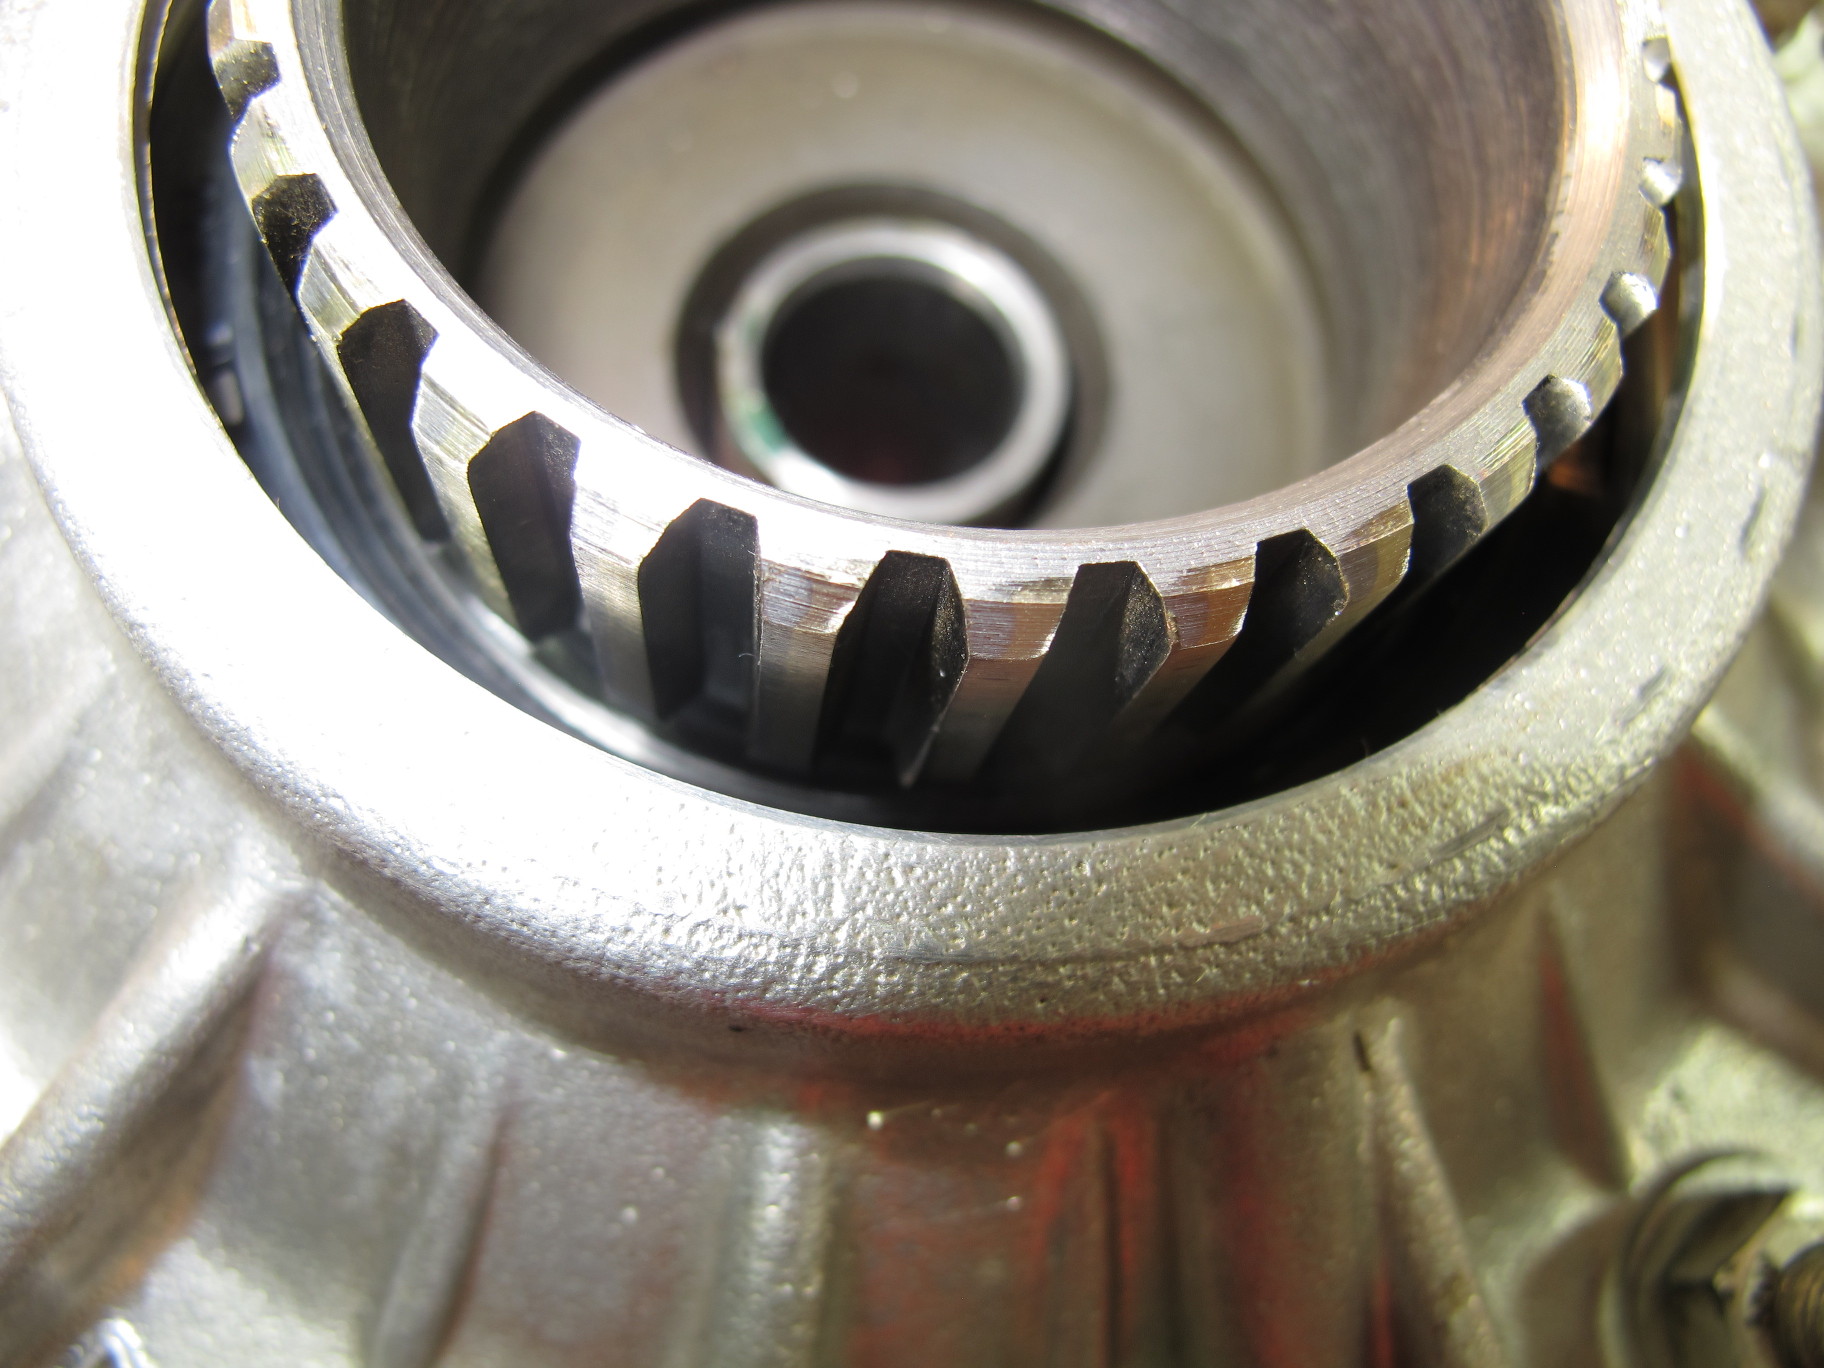
While the swing arm is back in the bike, I still have to build a tool to torque the drive shaft bolts. I have new bolts, which are shorter than the bolts I removed as the new bolts don’t use lock washers.
To remove and install the swingarm nuts I had to modify a 27mm socket. The proper way to modify the socket is with a metal lathe. I don’t have one of those, so I used a Dremel tool with a grinding bit as shown here.
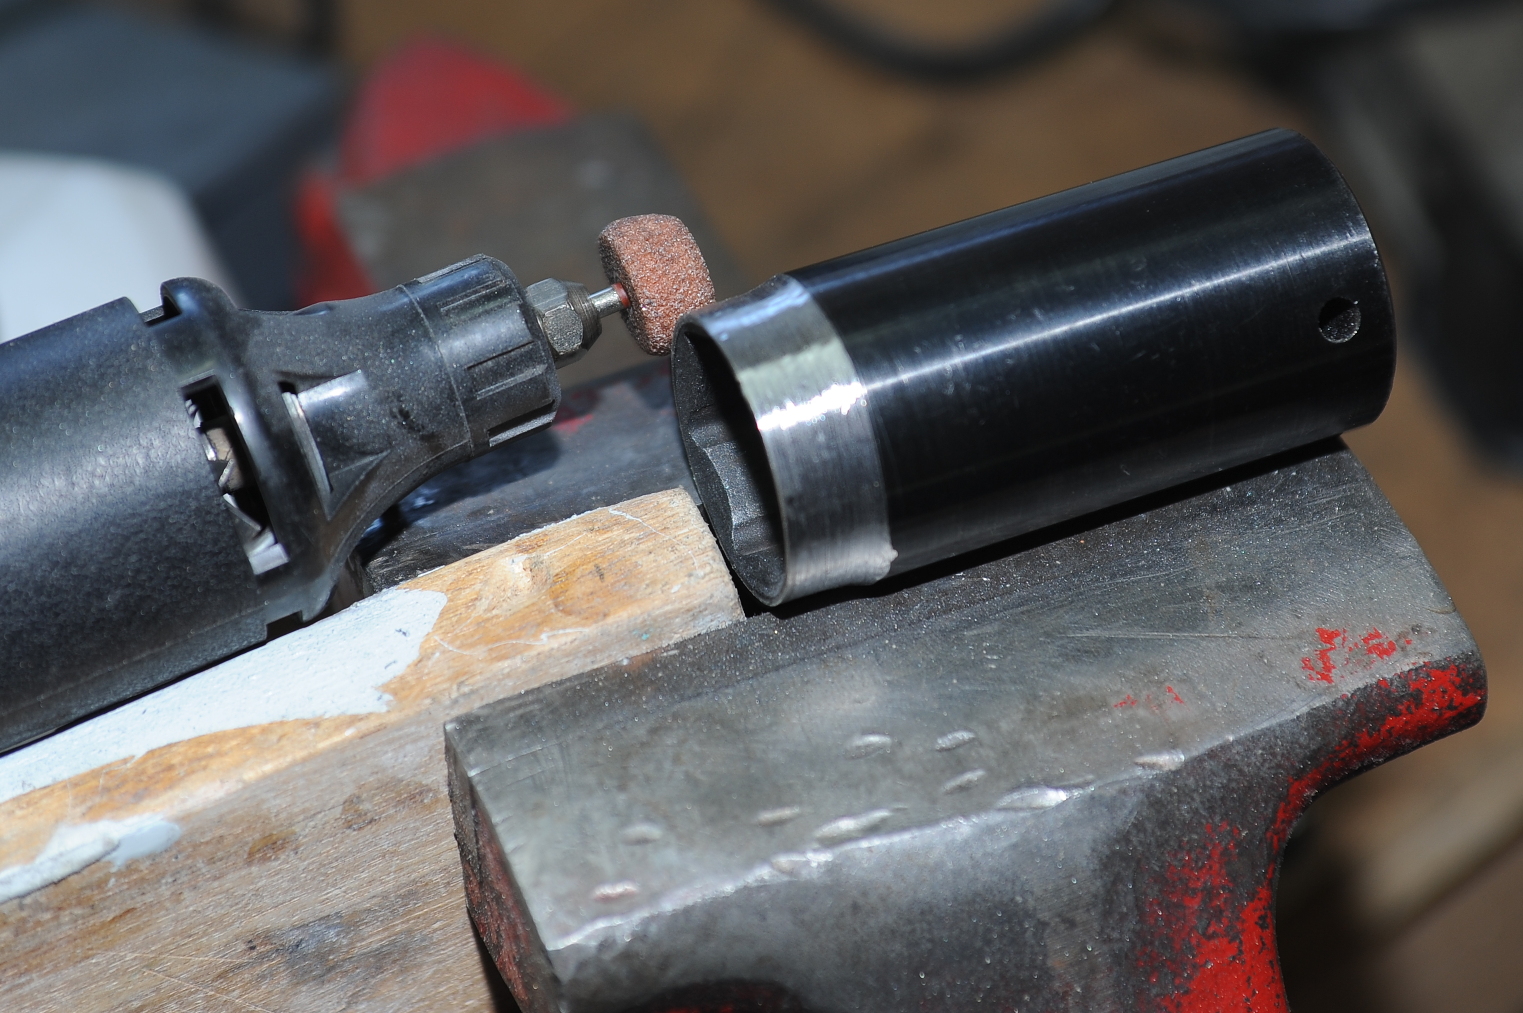
To make the grind, I would spin the socket with the palm of my right hand. I held the Dremel tool with my left hand, applying pressure when the socket was spinning, and removing pressure as I ran out of palm. It wasn’t fast, but accuracy was surprisingly good. The wood block is there to provide a stop for the socket to rub against while turning, preventing left-right movement. If you try this, don’t forget to wear eye protection.
I used the swing-arm adjusters to center the swing arm with some pressure from the pins (to preload the bearings. Once centered I torqued the adjuster pins to 180 in-lbs, backed them off slightly and torqued to 100 in-lbs. The adjuster nuts were torqued to 75 ft-lbs.
The Clymer’s manual indicates the the drive shaft splines at the final drive input are supposed to be greased. This confused me for a bit as the drive shaft spins in gear oil. I finally decided that it must be for assembly purposes, so I put a little bit of general purpose axle grease on the splines expecting that it will wash away in the gear oil.